Maybe some of you are still confused about how to add a new column to an
existing table. Usually by running
php artisan:migrate rollback
this problem is solved.
But what if when developing the program and tables there are too many,
whereas we have to add several columns to the table that was created before.
Running php artisan:migrate rollback is not a solution. A very easy solution
is to use the new migration to add columns to the existing table. How do you
do it? Come on, follow the tutorial below.
How to Add New Columns to Existing Tables in Laravel
1. As a simple example, I will use the existing users table in laravel. Please run the command below to create a new table in the database.
php artisan migrate
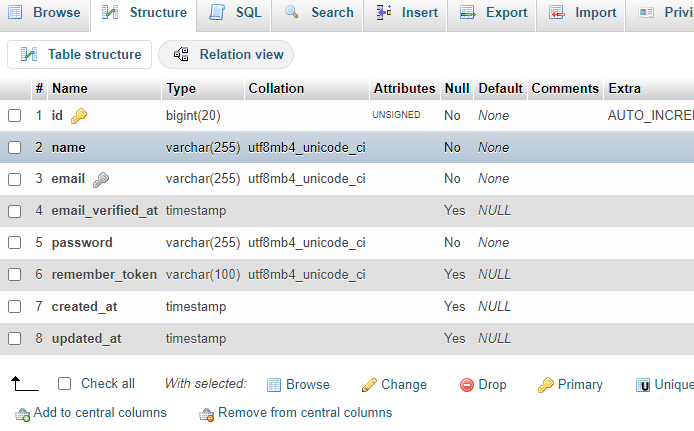
2. The following is the user table in the database. But it turns out that once it's been migrated, we need to add some new columns to the users table. The following is the users table in laravel without any editing.

|
| Table Users in Laravel |
3. Ok, please run the command below to create a new migration. add_some_column_to_users_table is the migration file name. So you are free to make the file name you want.
php artisan make:migration add_some_column_to_users_table
--table=users
4. Then open the migration file that we just created earlier. Then add some new columns in it, like the script below. The method for adding new columns is the same as when you created the migration file, so don't get confused.
<?php

  use Illuminate\Database\Migrations\Migration;
  use Illuminate\Database\Schema\Blueprint;
  use Illuminate\Support\Facades\Schema;

  class AddSomeColumnToUsersTable extends Migration
  {
      /**
       * Run the migrations.
       *
       * @return void
       */
      public function up()
      {
          Schema::table('users', function (Blueprint $table) {

              $table->text('address');
              $table->string('phone_number');
              $table->enum('gender', ['male', 'female']);

          });
      }

      /**
       * Reverse the migrations.
       *
       * @return void
       */
      public function down()
      {
          Schema::table('users', function (Blueprint $table) {
              //
          });
      }
  }
5. Run the command php artisan migrate. If no error occurs, please reopen your database and the output will look like the image below. It can be seen that there are 3 new columns that we have successfully added via migration.

|
| Add New Migration |
Ok, that's all for our short tutorial this time about how to add a new column to a database table in Laravel. Hopefully useful and can be implemented. If you have questions, please ask directly in the comments column below. That is all and thank you.


0 Comments
Come on ask us and let's discuss together
Emoji