Hello everyone, welcome back at porkaone. This time we will learn how to create a Flutter application and use a Firebase database to store data. Are you curious? Come on, follow the complete tutorial below.
Learn to Create Flutter and Firebase CRUD
1. Create a firebase project at https://firebase.google.com
2. Then connect the flutter project with firebase. You can follow how to connect the two via the following link https://www.porkaone.com/2023/12/tutorial-on-how-to-set-up-firebase-and.html. Or follow the tutorial via the video How to Connect Flutter and Firebase. The tutorial must be followed. Because it is related to the next stage.
3. Open firebase. Then go to the build menu --> firestore database --> click start collection to create a new collection. We can equate collections with databases in MySQL.
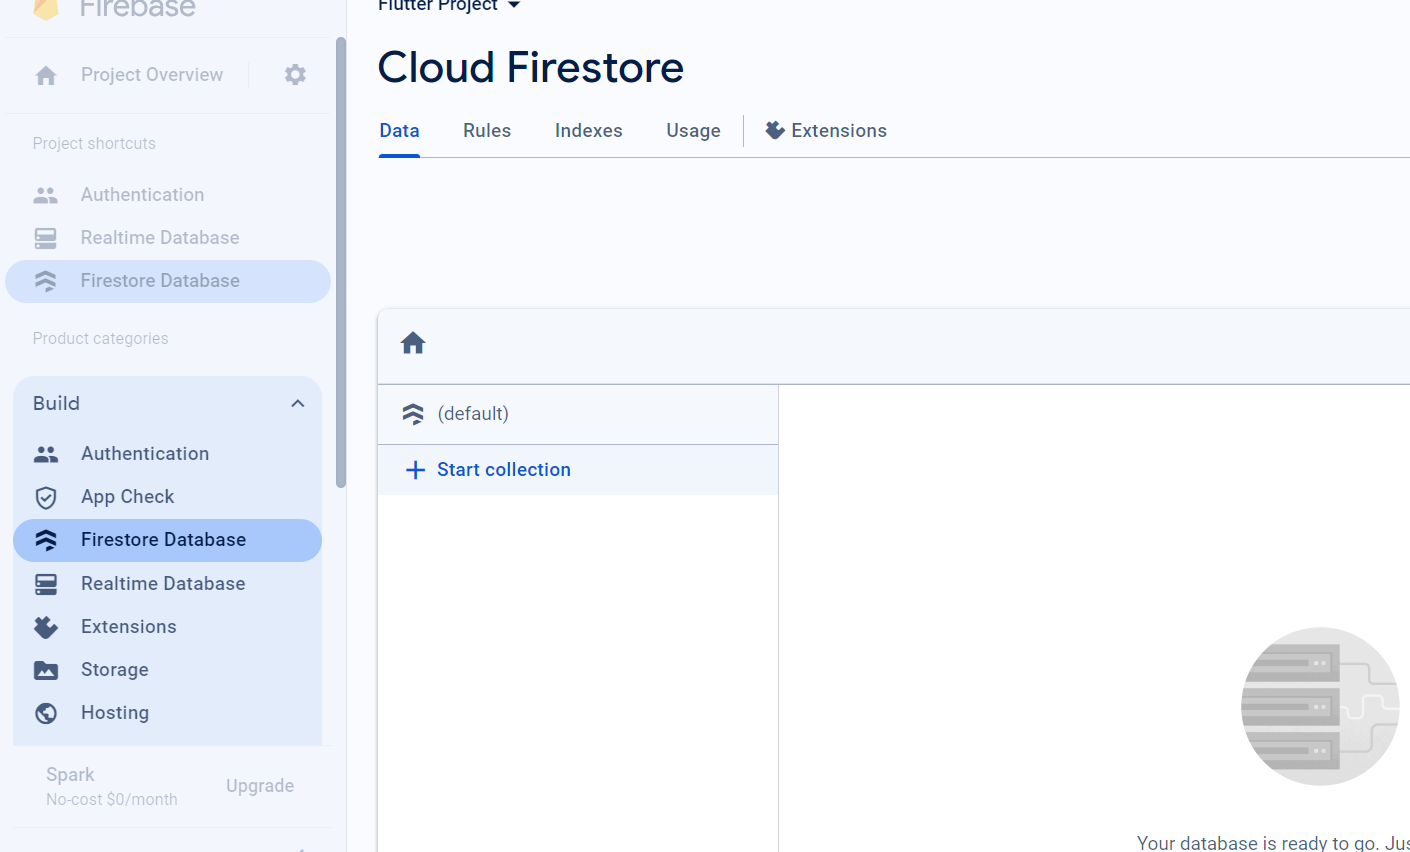
|
| Firebase |
4. Click start collection -> fill in the collection ID with notes --> then click next
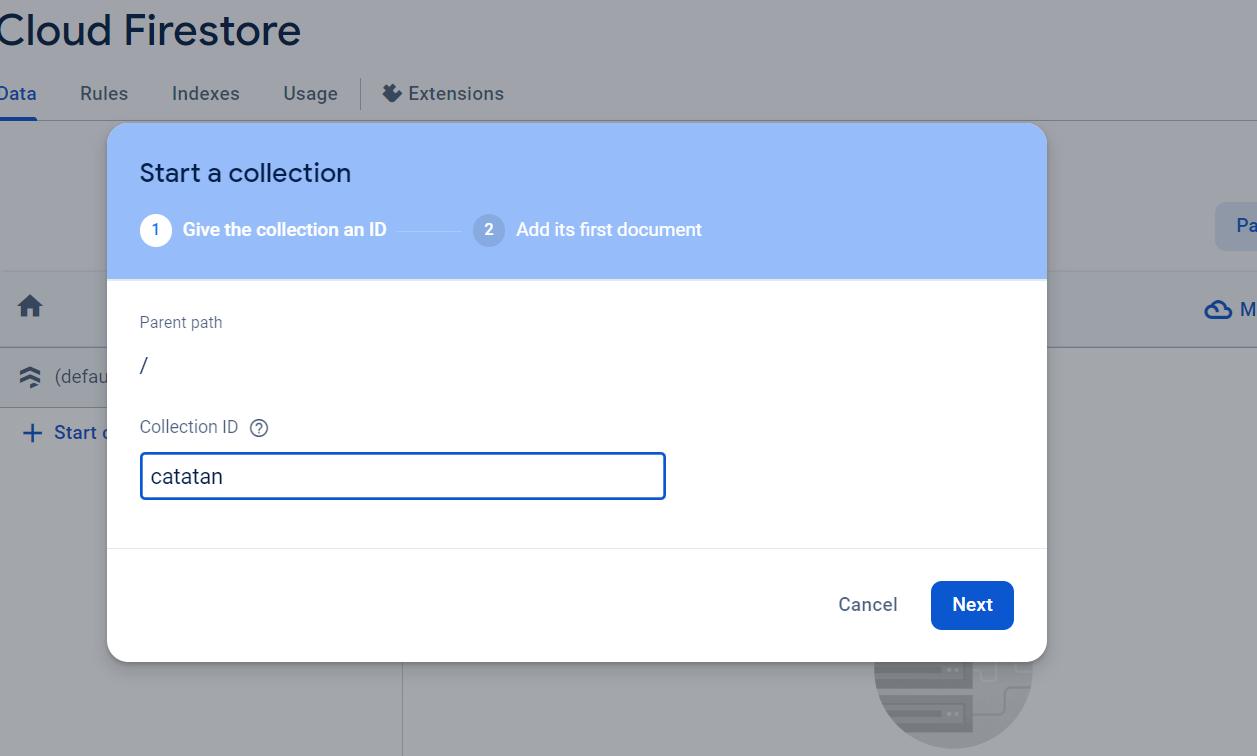
|
| Firebase |
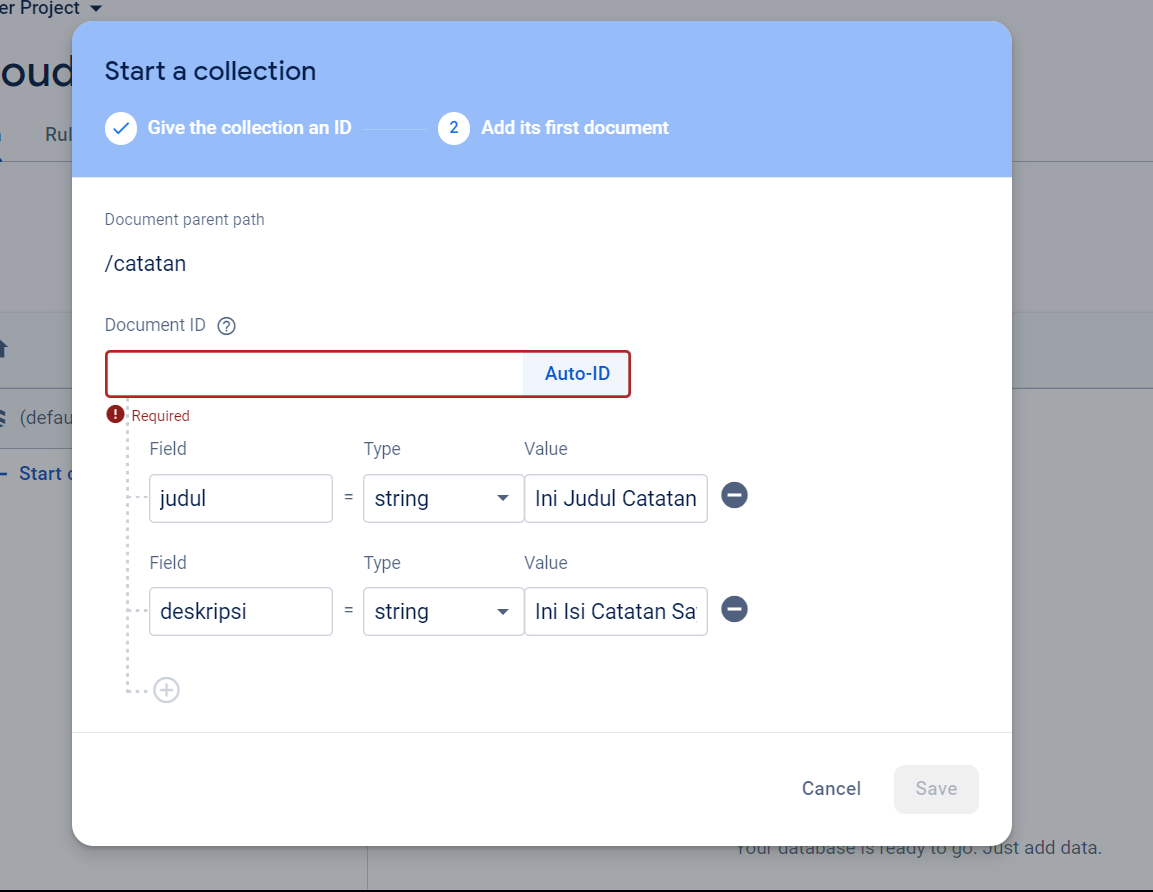
5. Then click auto-ID to fill in the document ID value. Fill in the first field and add the next field as shown in the image below. Then click save to save the collection.
6. Now your collection is ready. Next, we will display this data collection in the flutter project that you have prepared.

|
| Firebase Collection |
7. Open your respective flutter projects. I assume, you have prepared a flutter project and are connected to firebase. But if not, please follow the tutorial again in stage 2.
8. Ok, please open the pubspec.yaml file. Then add the firebase_core: ^2.23.0 and cloud_firestore: ^4.4.5 packages as shown below. Then save the file to download the required packages.

|
| Add Package |
9. Open the main.dart file, then replace it with the script below.
import 'package:firebase_core/firebase_core.dart';
import 'package:flutter/material.dart';

import 'firebase_options.dart';
import 'home_page.dart';

void main() async {
  WidgetsFlutterBinding.ensureInitialized();

  await Firebase.initializeApp(
    options: DefaultFirebaseOptions.currentPlatform,
  );

  runApp(MyApp());
}

class MyApp extends StatelessWidget {
  @override
  Widget build(BuildContext context) {
    return MaterialApp(
      title: 'Firebase CRUD',
      theme: ThemeData(
        primarySwatch: Colors.blue,
      ),
      home: HomePage(),
    );
  }
}
10. Create a home_page.dart file in the lib folder. Then follow the script as below.
// ignore_for_file: prefer_const_constructors, use_key_in_widget_constructors

import 'package:flutter/material.dart';
import 'package:cloud_firestore/cloud_firestore.dart';
import 'package:flutter_firebase_auth/input_data_page.dart';

class HomePage extends StatelessWidget {
  final CollectionReference dataCollection =
      FirebaseFirestore.instance.collection('catatan');

  @override
  Widget build(BuildContext context) {
    return Scaffold(
      appBar: AppBar(
        title: Text('Firebase CRUD'),
      ),
      body: StreamBuilder(
        stream: dataCollection.snapshots(),
        builder: (context, snapshot) {
          if (!snapshot.hasData) {
            return CircularProgressIndicator();
          }

          return ListView.builder(
            itemCount: snapshot.data!.docs.length,
            itemBuilder: (context, index) {
              var data = snapshot.data!.docs[index];
              return ListTile(
                title: Text(data['judul']),
                subtitle: Text(data['deskripsi']),
                trailing: IconButton(
                  icon: Icon(Icons.edit),
                  onPressed: () {
                  },
                ),
              );
            },
          );
        },
      ),
      floatingActionButton: FloatingActionButton(
        onPressed: () {

        },
        child: Icon(Icons.add),
      ),
    );
  }
}
11. Next, open android/app/build.gradle. Then change it to minSdkVersion 19. Then add multiDexEnabled = true and implementation 'com.android.support:multidex:1.0.1' as shown below. This is important to add to avoid errors.

|
| Add Script |
12. Ok, now you can do the test. Please run this flutter project via the emulator. If successful, the display will look like the image below.

|
| Final Result |






0 Comments
Come on ask us and let's discuss together
Emoji